
Interior Trim Installation on the North Shore, MA
Interior trim installation is the finish work that makes a room look built, not just painted. Premium Pro Contractors installs baseboard, casing, crown molding, wainscoting and chair rail across the North Shore of Massachusetts, cut and coped on site by licensed, insured finish carpenters, with clean, gap-free joints and one accountable contractor from estimate to final walkthrough.

What interior trim installation actually is
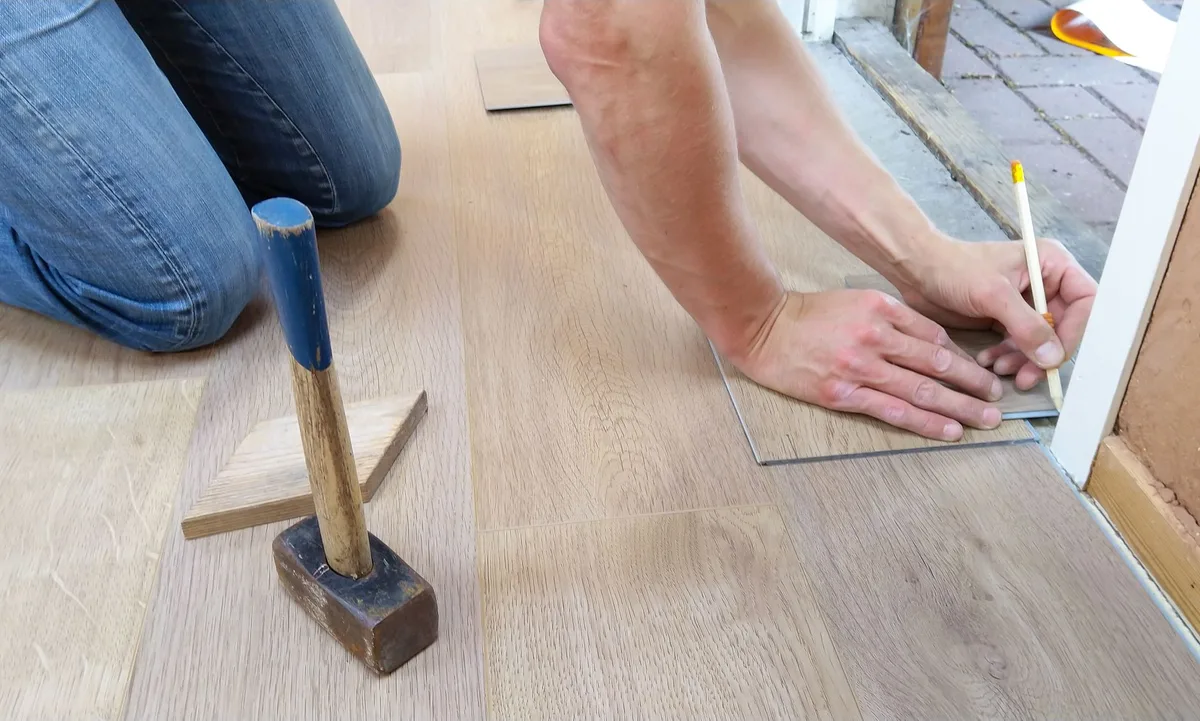
Interior trim installation is the process of cutting, fitting and fastening the finished woodwork that frames a room: the baseboard where the wall meets the floor, the casing around doors and windows, the crown molding at the ceiling, and detail work like chair rail and wainscoting. It is the last layer of carpentry in a home, and it is the layer everyone actually sees and touches. Done well, trim hides the gaps between drywall, floors and openings, gives a room proportion and character, and reads as one clean, continuous line. Done poorly, it shows every open miter, wavy reveal and caulk-filled seam.
Trim is finish carpentry, not framing, and it lives or dies on the details. Walls are rarely square, floors are rarely level, and old North Shore homes are almost never either. A good trim installation accounts for all of that, scribing pieces to fit real conditions instead of forcing straight stock onto crooked walls. That is the difference between a room that feels finished and one that feels almost done.
Types of interior trim we install
Most homes use several of these together. We help you match new profiles to your existing trim, or step the whole home up to a single consistent look.
Baseboard
The horizontal trim where wall meets floor. It protects drywall, hides the flooring expansion gap and grounds the room. Heights and profiles range from simple ranch base to tall, layered colonial base.
Door & window casing
The trim that frames openings. Clean, consistent casing with tight miters (or classic butt-and-block detail) instantly upgrades how doors and windows read throughout the home.
Crown molding
The molding that bridges wall and ceiling. It adds height and a finished, custom feel, but it is the least forgiving trim to install, with compound miters and coped corners on long runs.
Wainscoting
Paneling on the lower portion of a wall, from board-and-batten to raised or flat-panel and picture-frame styles. It adds texture and protects high-traffic walls in entries, dining rooms and stairs.
Chair rail
A horizontal molding run mid-wall, historically to protect plaster from chair backs. Today it caps wainscoting or splits a two-tone paint scheme cleanly.
Window & door trim details
Stools, aprons, extension jambs, transom and header details and interior doors hung and cased square, so every opening operates and looks right.
Why professional trim installation matters
Trim carpentry looks simple and is anything but. The visible failures are almost always at the joints. Inside corners on baseboard and crown should be coped, not mitered, so seasonal wood movement does not open them up. Outside corners need tight, glued miters that will not crack. Long walls need matched, biscuited or scarfed splices that disappear. Reveals, the sliver of jamb left showing around a door, have to stay perfectly consistent or the eye catches every wobble.
Add real-world conditions, out-of-square rooms, bowed studs, uneven floors, and you see why the same length of trim can look flawless in one home and rough in another. A finish carpenter scribes pieces to the actual surface, back-cuts for tight faces, and fills, caulks and sands so paint lands clean. We also fasten into structure with the right nail schedule so trim does not pop off the wall a year later. That craft is what you are paying for, and it is exactly what separates professional interior trim installation from a weekend DIY attempt that looks fine until the paint dries.
Interior trim installation across the North Shore
Beyond explaining the work, this is what we actually do for homeowners: install and replace interior trim throughout your home, done by our own finish carpenters, not passed off to a rotating cast of subs. Because Premium Pro Contractors is a full general contractor, trim can be a standalone job (new baseboard and casing after new floors, crown in the living room, wainscoting up a staircase) or part of a larger remodel where trim ties the whole project together. Either way, you get one accountable contractor from the first measurement to the final walkthrough.
We are a family-run, licensed and insured general contractor based in Peabody, and most of our work comes from referrals across the North Shore. You get a written, itemized scope up front, a realistic schedule, and a crew that treats a lived-in home like it is still lived in: floors covered, dust controlled, and nail holes filled before we leave. Trim pairs naturally with our interior painting and cabinet painting work, and it is one of the highest-impact upgrades in any kitchen remodel or bathroom remodel.
How much does interior trim installation cost?
Trim is usually priced per linear foot installed, which covers the material, the cutting and fitting labor, and the fill, caulk and sanding that make it paint-ready. Crown and wainscoting cost more because they take more time and skill per foot. These are typical North Shore ranges to help you plan; your written estimate is exact and itemized.
| Trim type | Typical North Shore range (installed) |
|---|---|
| Baseboard | $4 to $9 per linear foot |
| Door & window casing | $6 to $12 per linear foot |
| Crown molding | $8 to $18 per linear foot |
| Chair rail | $5 to $10 per linear foot |
| Wainscoting / paneling | $10 to $30 per square foot |
| Single room refresh (base + casing) | $800 to $2,500 |
Material choice moves the number: painted MDF is the budget option, primed pine (paint-grade) is the mid range, and stain-grade hardwood such as poplar, maple or oak costs the most. Taller and more layered profiles, and rooms with lots of corners and openings, add labor. We give you the exact figure in writing before any work begins.
Our trim installation process
1. Free estimate
We visit, look at the space and existing trim, and measure the real linear footage.
2. Written proposal
Trim style, material grade, schedule and an itemized price, in writing.
3. Cut & install on site
Scribed to your walls, coped corners, tight miters, fastened into structure.
4. Fill, caulk, walkthrough
Nail holes filled, seams caulked, everything sanded paint-ready, then we review it with you.
Interior trim installation: DIY vs professional
We are honest about this: if you have a level floor, a straight wall and patience, installing a run of simple baseboard yourself is realistic. Where DIY trim tends to fall apart is on coped inside corners, mitered returns, out-of-square rooms and any run of crown molding, all of which need the right saw setup, a coping technique and enough reps to make the cut tight the first time. On a long wall or a whole home, small errors multiply and the fill-and-caulk cleanup eats the time you thought you saved. Most homeowners DIY a small closet or one room, then hire out crown, wainscoting and whole-home trim so the finished result actually looks finished. When you want that professional line, we install trim day in and day out and make the joints disappear.
Why homeowners choose Premium Pro Contractors for trim
Own finish carpenters
Trim is installed by our carpenters, not handed to a random sub, so the craft and accountability stay in-house.
Scribed to your home
We fit trim to real, out-of-square North Shore walls instead of forcing straight stock and caulking the difference.
One accountable contractor
From estimate to final walkthrough you deal with one point of contact, whether trim is the whole job or part of a remodel.
Paint-ready finish
Nail holes filled, gaps caulked, everything sanded smooth so your painter, or ours, gets a clean canvas.
Baseboard installation, done right
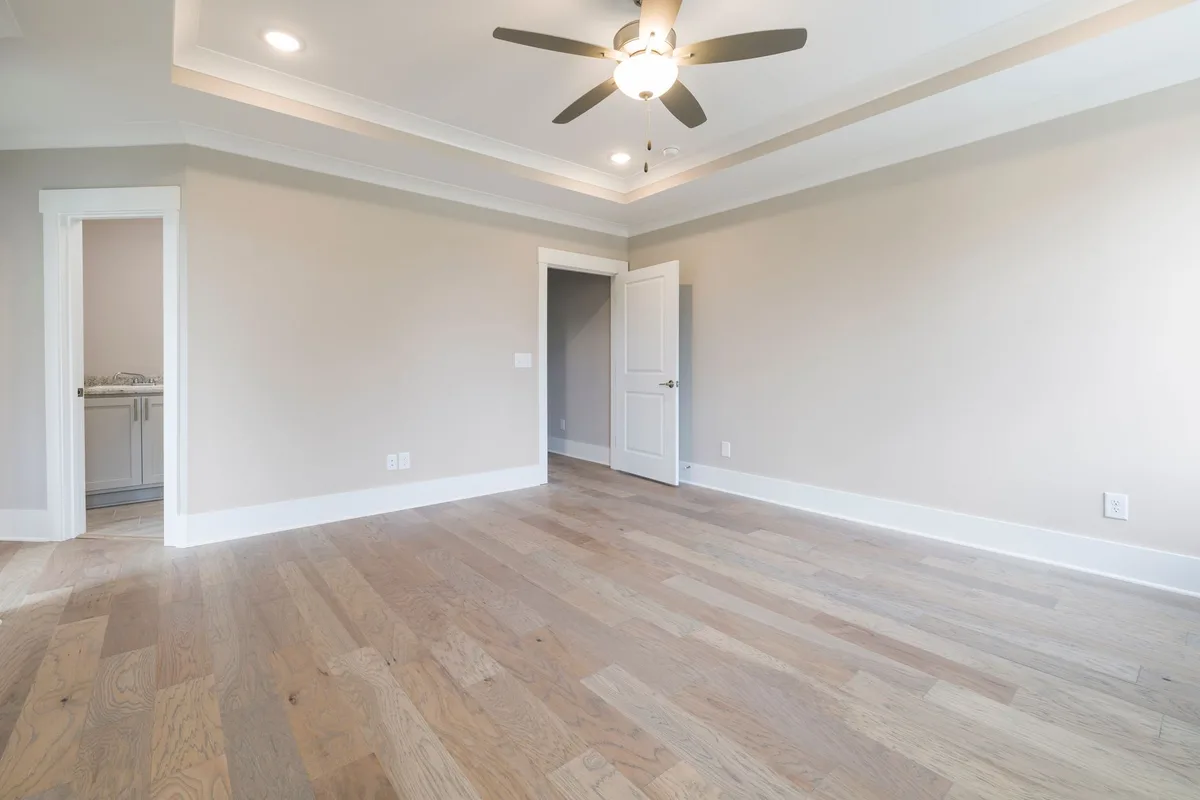
Baseboard is the trim homeowners request most, and it is deceptively tricky because the floor is the enemy. Almost no floor is dead level, so a straight run of base will show a shadow gap in some spots and pinch tight in others. We scribe the bottom edge where floors dip, cope the inside corners so seasonal movement does not open a visible crack, and glue and pin the outside miters so they stay closed. On tile or uneven surfaces we adjust the reveal and, where it fits the look, add shoe molding or quarter round to close the last small gap cleanly. Height and profile are a design choice too: a taller, layered colonial base reads more traditional and substantial, while a simple flat or ranch base suits a cleaner, modern room. We help you pick a profile that matches the age and style of your North Shore home.
Crown molding installation
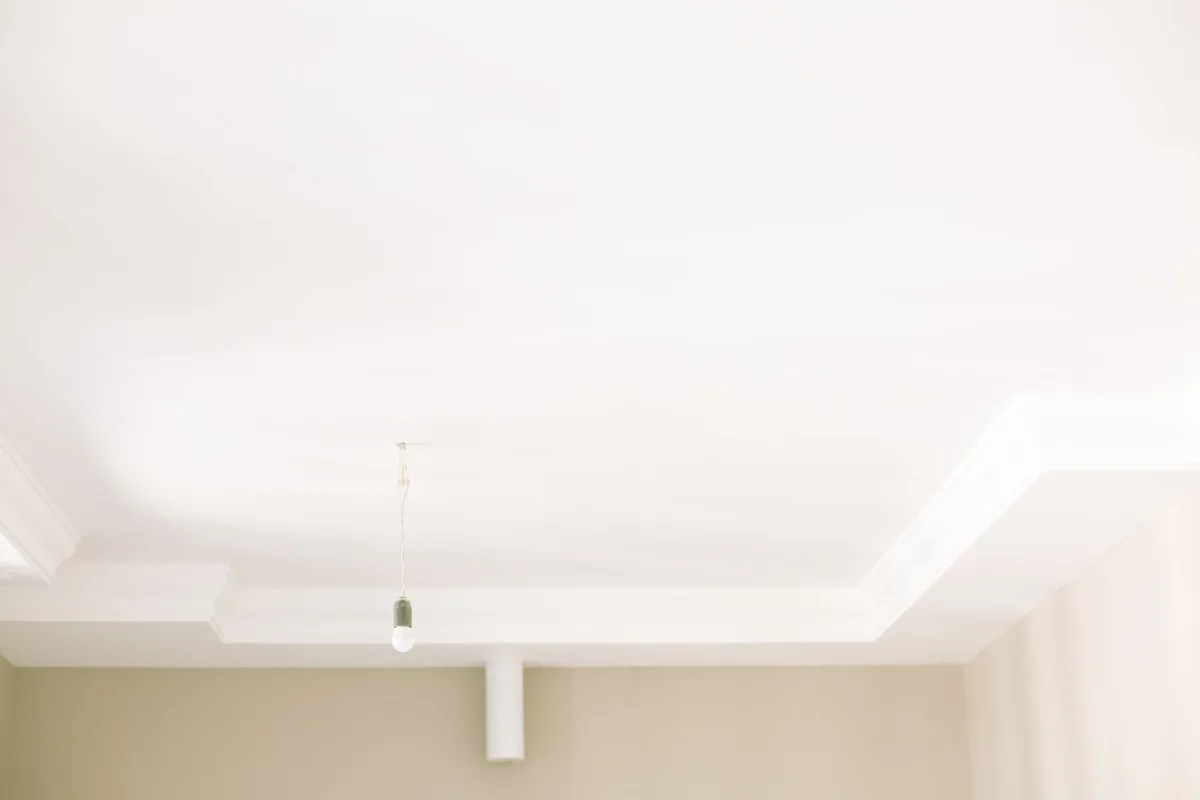
Crown is the most demanding trim to install well and the one where hiring a pro pays off most. It sits at an angle between wall and ceiling, so every corner is a compound cut, and inside corners should be coped rather than mitered so the joint stays tight when the house moves. Long walls need matched splices that disappear, and rooms with soffits, tray ceilings or bulkheads add returns and transitions that have to line up. We set consistent spring angles, cope by hand where it matters, and back-cut so faces pull tight to out-of-square walls. The result is a continuous, elegant line around the room instead of a series of open corners caulked into submission. Crown adds perceived ceiling height and a custom, finished feel to living rooms, dining rooms, primary bedrooms and entries.
Wainscoting and wall paneling
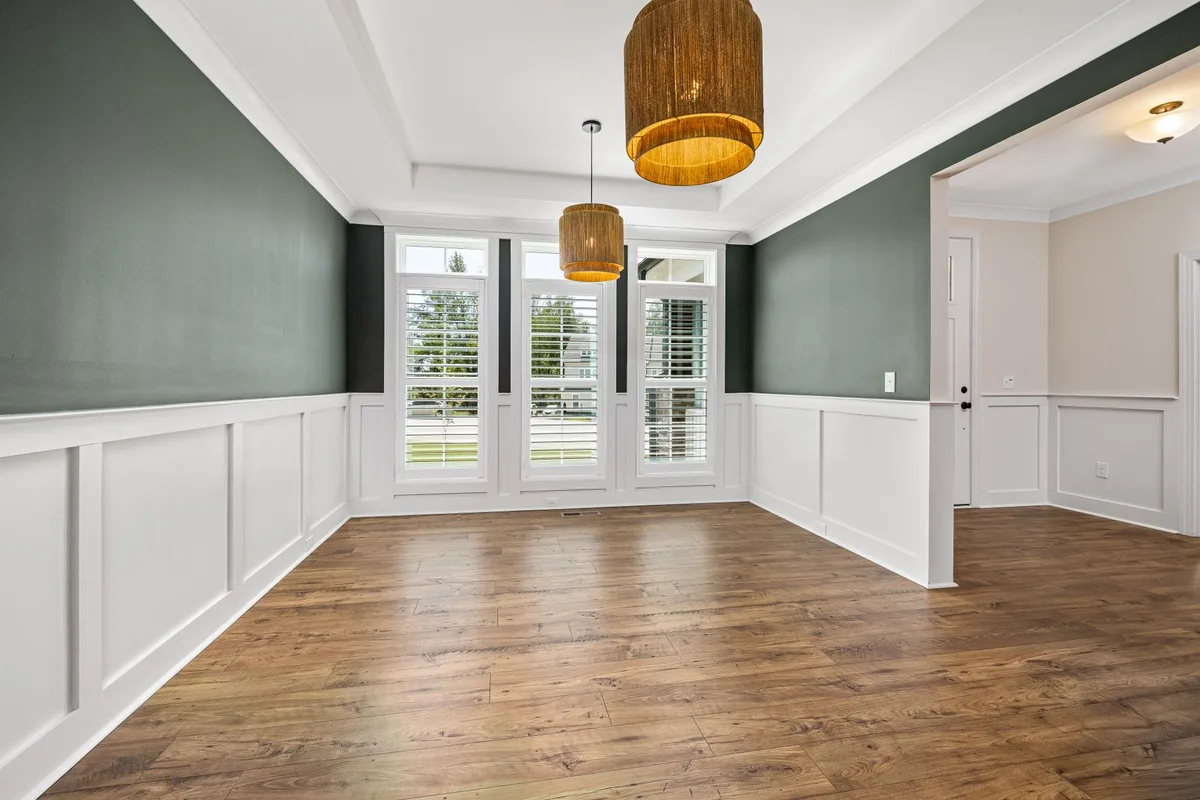
Wainscoting covers the lower part of a wall and does two jobs at once: it protects high-traffic surfaces and adds architectural character. There are several styles we install. Board-and-batten uses vertical battens over a flat base for a clean, modern-farmhouse look. Raised-panel wainscoting is more traditional and formal, with framed panels that catch light. Flat-panel (Shaker) sits between the two, and picture-frame paneling applies simple molding boxes directly to the wall for a lighter, budget-friendly version of the same effect. Wainscoting is typically capped with a chair rail or a proper cap molding and finished with a base at the floor, so it is really an assembly of several trim pieces working together. It shines in dining rooms, entries, hallways and up staircases, and it is one of the most-noticed upgrades a homeowner can make.
Door and window casing and interior doors

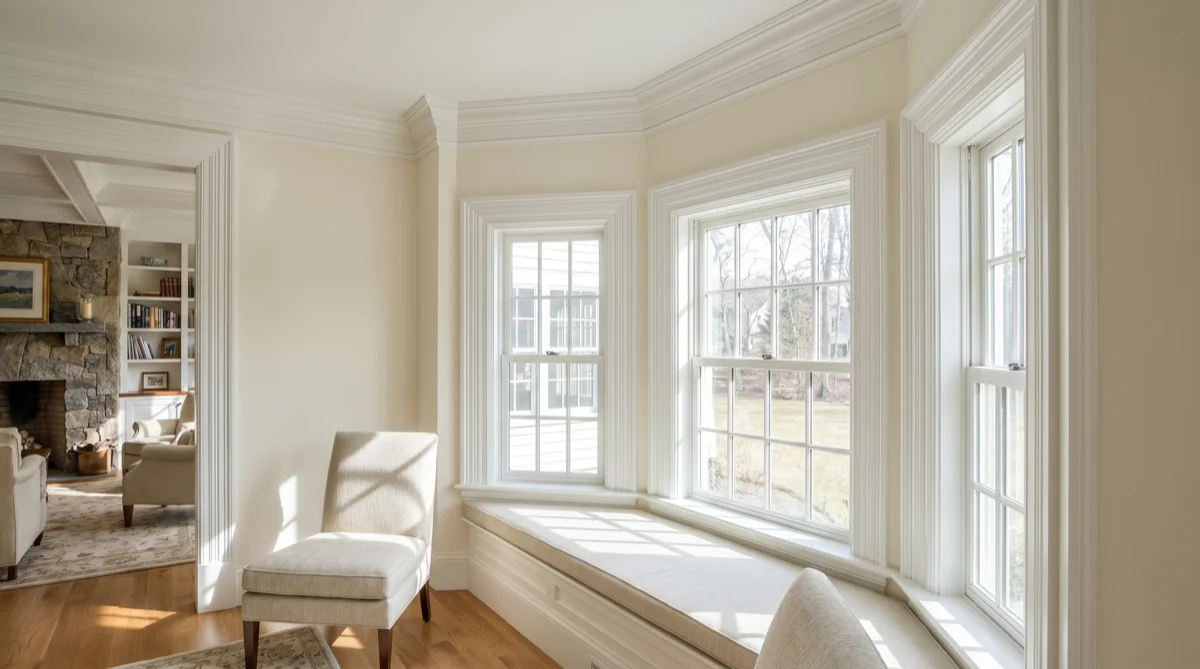
Casing frames every opening in the home, so consistency here sets the tone for the whole space. We keep reveals even, miters tight (or install classic butt-and-block and rosette details when the style calls for it), and window stools and aprons cut clean. When windows need it we add extension jambs so the casing sits proud and correct. We also hang and case interior doors, shim them plumb so they latch and swing right, and trim them to match the rest of the home. Replacing dated, mismatched casing with one clean profile is a fast, high-impact update that makes an older home feel current without touching the walls behind it.
Chair rail, picture rail and detail moldings
Smaller detail moldings do a lot of visual work. Chair rail runs horizontally at mid-wall height to cap wainscoting or to divide a two-tone paint scheme with a crisp line. Picture rail runs higher on the wall for hanging art without nail holes and adds a period-correct touch to older homes. We also install shoe and quarter round, transition and reducer trims, and custom built-up profiles that layer stock moldings into something richer. These pieces are where a trim package goes from standard to designed, and getting the heights and proportions right is what keeps them looking intentional rather than tacked on.
Trim materials: MDF, pine and hardwood
Material choice drives both the look and the price. Paint-grade MDF is stable, smooth, knot-free and budget-friendly, which makes it a strong choice for painted baseboard, casing and crown in dry interior spaces; it should be kept away from moisture. Primed finger-joint or solid pine is the classic paint-grade wood: a little pricier than MDF, more durable on impact-prone edges, and easy to work. Stain-grade hardwoods such as poplar, maple and oak are for trim you want to show the grain, and they cost the most in both material and labor because every joint has to be flawless with no caulk to hide it. We walk you through the trade-offs so the material fits the room, the finish you want and the budget, then source and install it.
Matching new trim to existing woodwork
Many jobs are not a whole-home redo but an addition, a repair or a single renovated room, and the goal is for the new trim to look like it was always there. Matching an existing profile means measuring the old molding, finding the closest stock match or milling a custom profile, and blending the transition so there is no obvious seam between old and new. Older North Shore homes often carry beautiful original trim that is worth preserving; we repair and extend it rather than rip it out. When profiles simply cannot be matched, we will tell you honestly and offer options, from a clean visual break at a doorway to updating a whole floor to one consistent profile.
Preparing trim for a professional paint finish
The last five percent is what people remember. Before we call trim done, every nail hole is filled, every joint and wall gap is caulked, and the whole surface is sanded so paint flows smooth with no telegraphed seams. Paint-grade trim is primed where needed so the topcoat is even. This prep is exactly why professional trim looks sharp under paint and rushed DIY trim shows every filled hole and open miter. Because we also do interior painting, we can hand off a clean canvas to your painter or finish the paint ourselves, so responsibility for the final look stays in one place.
Common trim installation mistakes we avoid
Most of what makes trim look amateur is a short list of repeat mistakes: mitering inside corners instead of coping them, so they open up; inconsistent reveals around doors and windows; over-caulking to hide poor cuts, which cracks later; nailing into drywall instead of framing, so trim works loose; forgetting to account for out-of-square walls and uneven floors; and mismatched profiles that fight each other from room to room. We design around all of it. Coped corners, even reveals, tight joints that need minimal caulk, correct fastening into structure, and one consistent profile plan for the space. It is the same finished trim other people photograph and wish they had.
How long trim installation takes
Timelines depend on scope and trim type. A single room of new baseboard and casing is often a one to two day job. Adding crown molding, or running wainscoting up a staircase and through a dining room, moves it to roughly three days to a week, and that is before fill, caulk, sand and paint. Whole-home trim replacement is scheduled in phases so you can live in the house while we work. We give you a realistic day count in the written proposal and keep the site clean and organized throughout, because a trim job that runs long and messy is not actually finished, no matter how good the corners look.
Board-and-batten wainscoting
Board-and-batten is the wainscoting style homeowners ask for most right now. It uses evenly spaced vertical battens over a smooth base, capped with a top rail or ledge, for a clean, modern-farmhouse look that suits entries, mudrooms, dining rooms and stairwells. The craft is in the spacing: battens have to be laid out so the room reads balanced, with corners and door openings landing on full or intentional partial bays rather than awkward slivers. We plan the layout to the actual wall, not a generic template, so the finished wall looks designed.
Raised-panel and Shaker paneling
When a room calls for something more traditional, raised-panel wainscoting brings framed panels with a beveled face that catch light and add formality, common in dining rooms and studies. Flat-panel, or Shaker, paneling is the quieter middle ground: recessed panels with clean square frames that work in both classic and transitional homes. Both are built as a system of stiles, rails, panels, a chair rail cap and a base, and both live or die on consistent reveals and tight, square joinery, which is exactly the finish-carpentry detail we focus on.
Coffered and ceiling trim details
Trim is not only for walls. Coffered ceilings, beam wraps and simple ceiling grids add depth and a high-end feel to living rooms, offices and dining rooms. These details tie into crown work and demand careful layout so the grid is symmetric and the intersections are clean. We build them to the room, level and square, and finish them paint-ready like the rest of the trim package.
Stair trim, skirtboards and railings
Staircases are a showcase for finish carpentry. Skirtboards run the trim line up alongside the treads, and getting them scribed to the stringer and stairs is fussy, precise work. We handle skirtboards, wall trim up the stair, and coordinate railings, newels and balusters so the whole run reads as one considered detail rather than a set of parts. Wainscoting up a staircase, capped with a rake chair rail that follows the pitch, is one of the highest-impact trim upgrades in a home.
Trim repair and replacement
Not every job is new trim. We repair damaged baseboard and casing, replace water-stained or dented pieces, re-secure trim that has worked loose, and fix corners that previous installers left open. On older homes with original woodwork worth keeping, we patch and blend rather than tear out. When you are replacing floors, we remove and reinstall or replace base and shoe cleanly so the new floor gets a proper finished edge.
Trim as part of a whole-home upgrade
One of the most cost-effective ways to modernize a dated home is a consistent trim package: one clean casing profile on every opening, a taller base throughout, and crown in the main rooms. Because it touches every room without moving a wall, whole-home trim transforms how a house feels for a fraction of a gut renovation. We phase it so you can stay in the home, and because we are a full general contractor it can roll into a broader remodel when that makes more sense.
Choosing trim styles for your home
Trim should match the age and architecture of the house. A traditional colonial wants layered, taller profiles and can carry raised-panel wainscoting; a mid-century or modern home reads better with simpler, flatter stock and minimal reveals. Ceiling height, window size and existing details all factor in. We bring options and honest guidance to the estimate so the profiles you choose fit the home rather than fighting it, and so every room feels part of the same design language.
Licensed, insured North Shore finish carpenters
Trim is inside your home, so it matters who is doing it. Premium Pro Contractors is a family-run, licensed and insured Massachusetts general contractor, and interior trim is installed by our own finish carpenters. You get proof of license and insurance before we start, a written itemized scope, and one accountable contractor start to finish. Most of our work comes from North Shore referrals, which is the standard we hold every trim job to.
What to expect on installation day
On install day we protect floors and furniture, set up a clean cut station, and keep dust controlled with the room sealed and vacuumed as we go. Trim is measured, cut, coped and fastened piece by piece, then nail holes are filled and joints caulked. We clean up at the end of each day so the space stays livable, and we finish with a walkthrough where we look at every corner and reveal together before calling it done.
Interior trim installation in kitchens
Kitchens are full of trim opportunities that most people never notice until they are missing: toe-kick and light-rail detail on cabinets, crown that ties uppers to the ceiling, window casing over the sink, and clean base around the perimeter. Because cabinetry, counters and trim all meet in tight tolerances, this is precise finish work. When trim ties into a full remodel we coordinate it with the rest of the kitchen remodeling scope so everything lands on one schedule.
Interior trim installation in bathrooms
Bathrooms need trim that tolerates moisture, so material choice matters even more here. We favor moisture-tolerant options and proper caulking around wet zones, and keep window and door casing consistent with the rest of the home. Trim is usually the finishing layer of a bathroom remodel, framing the space after tile, vanity and fixtures are set.
Getting an accurate trim estimate
An accurate quote starts with a real measure, not a phone guess. We walk the space, note the trim types you want, count openings and corners (which drive labor), confirm material grade, and account for out-of-square conditions. You get one written, itemized number covering material and installation, with no surprise add-ons once the work starts. Sending a few photos ahead of the visit helps us come prepared.
Why one accountable contractor matters for trim
Trim is where a project either comes together or falls apart, because it touches floors, walls, doors, cabinets and paint all at once. When those trades do not talk to each other, the trim is where the gaps show. Our one-contractor model means a single point of responsibility owns how every finish meets, so nothing gets blamed on the next sub. That is the whole reason our referral-built business holds up.
Book your free trim consultation
If you are planning interior trim installation anywhere on the North Shore, the next step is a free, no-pressure estimate. Send your project details or a few photos and we confirm scope, trim style, timing and a written price. Most homeowners hear back within 24 hours, and you deal with the same licensed, insured contractor from that first call through the final walkthrough.
Areas we serve for interior trim installation
From our Peabody base we install interior trim throughout the North Shore of Massachusetts, including Peabody, Lynnfield, Marblehead, Beverly, Salem, Danvers, Swampscott, Saugus and the surrounding towns. Whether it is one room of crown, new casing after a floor install, or a full wainscoting and baseboard package, a North Shore trim project is right in our core service area. See all the areas we serve.
Installed on site, fit to your home
Measured to your walls
No two walls in a home are the same. We measure and scribe yours, so trim fits real conditions instead of an approximation.
Cut and coped in place
Inside corners are coped and outside corners mitered on site for tight, gap-free joints that stay closed through the seasons.
Consistent reveals
Casing reveals and baseboard lines stay even across every opening and wall, the detail your eye notices even when it cannot name it.
Paint-ready
We fill nail holes, caulk gaps and sand everything smooth before we leave, so paint lands clean.
Interior trim installation FAQ
How much does interior trim installation cost on the North Shore, MA?
Trim is usually priced per linear foot installed. As a guide, baseboard runs about $4 to $9 per linear foot, casing $6 to $12, crown molding $8 to $18, chair rail $5 to $10 and wainscoting $10 to $30 per square foot. Painted MDF is the budget option, primed pine is mid range and stain-grade hardwood costs the most. Your written, itemized estimate is free so you see the number before work starts.
What types of interior trim can you install?
All of the common ones: baseboard, door and window casing, crown molding, chair rail, wainscoting and picture-frame paneling, plus built-ins and closet shelving. We match new profiles to your existing trim or upgrade the whole home to one consistent look.
How long does interior trim installation take?
A single room of baseboard and casing is usually a one to two day job. Crown molding or wainscoting across a main floor typically takes three days to a week, plus fill, caulk and sand time before paint. We confirm a realistic schedule in your proposal.
Should I install interior trim myself or hire a professional?
Straight baseboard on a level floor is doable for a confident DIYer. The trouble is coped inside corners, mitered returns, out-of-square walls and long crown runs, where small gaps show badly once paint hits. A finish carpenter has the tools and the reps to make tight joints the first time, which is why most homeowners hire out crown, wainscoting and whole-home trim.
Can trim be installed as part of a larger remodel?
Yes. Trim is often the finishing layer of a kitchen or bathroom remodel or a new floor install, and because we are a full general contractor it can be a standalone job or built into the larger scope, with one accountable contractor either way.
Are you licensed and insured?
Yes. We are a licensed and insured general contractor based in Peabody, MA, serving the North Shore. Proof of license and insurance is provided before we start.
Do you offer free estimates for trim work?
Yes. Send your project details or photos and we confirm scope, trim style, timing and next steps, then provide a written itemized quote at no cost.
Rated 4.8 Stars by 47 Neighbors on Google
Real, verified reviews from the Premium Pro Contractors Google Business Profile.

Claudiney and his team have completed three projects at my home. He painted it and it came out beautiful. My house is over 300 years old and you really have to know what you're doing. His crew works very hard and are very nice people.

Claudiney repaired a ceiling leak in our townhouse caused by an ice dam. He removed the damaged drywall, replaced it, and repainted the ceiling. Communication was good, the work was done on schedule, and the finished result looks great.

The Premium Painting & Carpentry team worked on my house last summer. They were neat, on time and very friendly. I would gladly recommend them for interior or exterior services.
Ready to finish your rooms the right way?
Free estimate. No pressure. Most homeowners hear back from us within 24 hours.